Making your own clothes can feel exciting and scary at the same time. You dream of having unique, handmade outfits, but the journey seems hard. We promise it’s something you can absolutely do.
Don’t worry about the confusion anymore. This guide gives you a clear, step-by-step path especially made for complete beginners. We’ll show you everything from getting the right mindset to setting up your workspace, understanding your tools, and finishing your very first handmade project. Now let’s get started.
Before You Sew a Single Stitch: Mindset and The Right Workspace

Your mindset is the most important sewing tool. Getting yourself and your space ready before touching a sewing machine is the key to a fun and successful learning experience. Most tutorials skip this foundation, but it’s what will keep you going when things get tough.
Embracing the “Imperfectly Perfect” Mindset
Your first project won’t be perfect, and that’s totally fine. We are learning a physical skill that needs practice. Every crooked stitch or uneven seam teaches you something and isn’t a failure.
Stop putting pressure on yourself to be perfect from the start. The sewing community grows from sharing learning experiences, which includes making many mistakes along the way.
Your goal is “finished,” not “flawless.”
Setting Up Your Sewing Space (Even a Small One)
You don’t need a whole craft room to start sewing. Just a quiet corner or small desk works fine, as long as it’s yours. The key is making it work well and feel good to use.
People sew successfully in tiny spaces all the time. A small rolling cart can hold all your tools and be hidden away when not in use. A pegboard on the wall keeps important items within reach without taking up desk space. Focus on making things efficient, not big.
Make sure your space has these four essential elements:
- Good Lighting: Use both overhead light and a direct task lamp. Seeing clearly helps you avoid mistakes and eye strain.
- Comfortable Chair: You might sit for long periods. A chair that supports your back will make sewing more enjoyable.
- Stable Surface for the Machine: Your sewing machine needs a sturdy table or desk that doesn’t wobble.
- Accessible Storage: Keep frequently used tools within easy reach. Nothing ruins your flow faster than searching for your seam ripper.
Your Essential Beginner’s Toolkit: What You Actually Need

Craft stores can be overwhelming with countless gadgets. You only need a few core items to start sewing clothes. We’ll help you focus on the essentials and save money.
The Must-Haves: Don’t Start Without These
These are the non-negotiable tools that form the base of your sewing kit. Each one has a specific purpose that helps you get started smoothly.
| Tool | Why It’s Essential |
|---|---|
| Sewing Machine | The heart of your operation. A basic, reliable machine with a straight stitch and a zig-zag stitch is all a beginner needs. |
| Fabric Scissors | These are for fabric only. Using them on paper will dull the blades instantly. A sharp pair ensures clean, precise cuts. |
| Pins or Clips | Used to hold pieces of fabric together before and during sewing. Pins are classic; clips are great for thicker fabrics or delicate ones you don’t want to pierce. |
| Measuring Tape | A flexible tape is crucial for taking body measurements and measuring curved pattern pieces. |
| Seam Ripper | Your new best friend. This small tool easily removes stitches when you make a mistake. Every single sewer, from beginner to expert, owns and uses one. |
| Fabric & Thread | You can’t sew without them! We’ll cover how to choose the right ones in the next section. |
| Iron & Ironing Board | Pressing your seams as you sew is the difference between a homemade-looking project and a professional-looking one. |
While this is your core starting kit, some experts suggest additional helpful items. For those ready to explore further, you can check out a more comprehensive list of essential sewing tools to see what you might want to add to your collection later on.
Nice-to-Haves: Tools to Consider Later
After completing a few projects, these tools can make your work easier and more precise. Don’t rush to buy them right away.
- Rotary Cutter & Self-Healing Mat: For cutting fabric incredibly quickly and accurately, especially straight lines.
- Clear Acrylic Rulers: Paired with a rotary cutter, these make precise measurements and cuts a breeze.
- Tracing Wheel & Paper: Used to transfer pattern markings onto fabric without marking the fabric directly.
- Pinking Shears: These scissors have a serrated edge that creates a zig-zag pattern to help prevent fabric edges from fraying.
Understanding Your Materials: Fabric and Patterns 101

Choosing the right fabric and learning to read patterns are two big challenges for beginners. Let’s break these down into simple concepts so you can shop for fabric with confidence.
Your First Fabric: Choosing an Easy-to-Handle Material
Fabrics fall into two main groups: woven and knit. Wovens stay put and don’t stretch, while knits are stretchy like t-shirts.
For your first project, we strongly suggest using a medium-weight woven fabric. These materials don’t move around much, hold their shape, and respond well to ironing, making them forgiving for beginners. Slippery fabrics like silk or very stretchy knits are hard to control and might frustrate you.
- Woven Fabric (Beginner-Friendly): Made of interlaced threads. Think of a classic button-down shirt. It’s stable and predictable.
- Knit Fabric (More Advanced): Made of interlocked loops. Think of a t-shirt. It’s stretchy and requires different needles and techniques.
Look for fabrics labeled “100% quilting cotton” or “cotton poplin.” These are perfect for beginners because they’re stable, easy to cut and sew, and come in many colors and patterns.
The Golden Rule: Why You MUST Pre-Wash Your Fabric
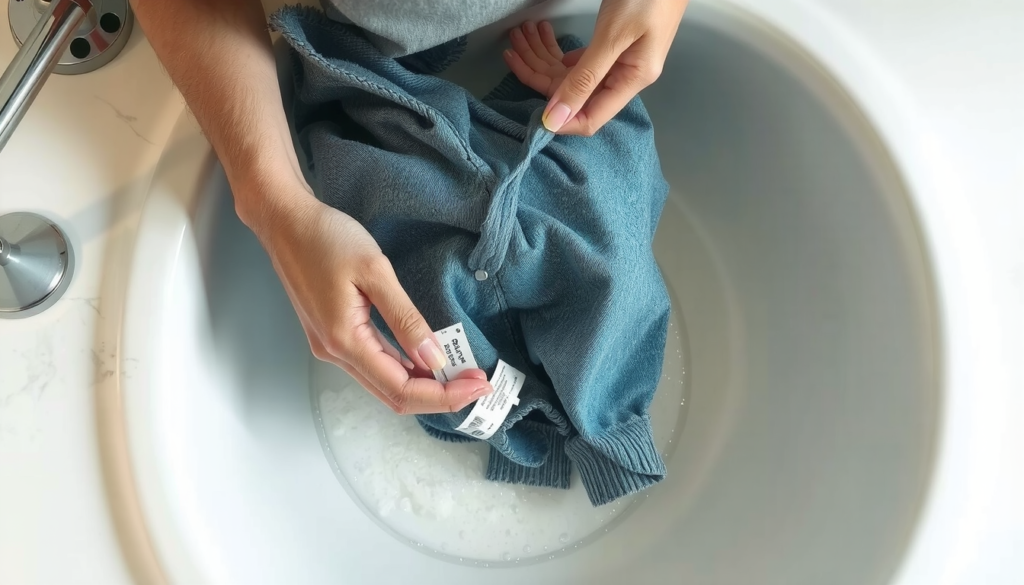
Never skip this step. Most natural fibers like cotton, linen, and rayon shrink the first time they’re washed and dried.
If you sew your clothes and then wash them, they might shrink and not fit anymore. Pre-washing your fabric exactly how you’ll wash the final garment ensures any shrinking happens before you cut and sew. This professional habit guarantees your handmade clothes will last a long time.
How to Read a Sewing Pattern: Demystifying the Symbols
A sewing pattern is your roadmap. At first, it looks confusing with many lines and symbols, but each mark has a specific meaning. Once you learn what they mean, patterns become much clearer.
Key parts include the size chart (to pick your size), fabric recommendations, and the cutting layout. The pattern pieces themselves have important symbols all over them.
Here are some common symbols you’ll see:
| Symbol | Meaning |
|---|---|
| A long, straight line with arrows at both ends | Grainline: This line is critical. It must be aligned with the grain (the direction of the threads) of your fabric to ensure the garment hangs correctly. |
| A solid, bold line | Cutting Line: This is the outermost line. You cut along this line. |
| A dashed or dotted line inside the cutting line | Stitching Line (Seam Line): This is where you will sew your seam. The space between this line and the cutting line is the seam allowance. |
| Small triangles or diamonds along the cutting line | Notches: These are used to match different pattern pieces together accurately. They are essential for lining up seams. |
Getting comfortable with these symbols is a huge step. For a deeper dive, understanding how to read a sewing pattern in full detail will give you even more confidence before you cut your fabric.
Your First Project: A Step-by-Step Guide to Sewing a Simple Tote Bag
Theory is useful, but real learning happens when you start sewing. Now we’ll guide you through a complete project: a simple, stylish tote bag. It’s a perfect first project because it uses only straight lines and teaches you basic skills.
Step 0: Gather Your Materials
- A sturdy woven fabric (like cotton canvas, duck cloth, or quilting cotton), about half a yard/meter.
- All-purpose sewing thread that matches your fabric.
- Your essential sewing toolkit (machine, scissors, pins, ruler, iron).
Step 1: Cutting Your Fabric
First, iron your pre-washed fabric until it’s smooth and flat.
From your fabric, cut two large rectangles for the bag body. A good starting size is 18 inches tall by 16 inches wide (46cm x 41cm).
Next, cut two smaller rectangles for the handles. These should be 22 inches long by 4 inches wide (56cm x 10cm).
Step 2: Sewing the Main Body
Place your two large bag pieces together with the “right” (or pretty) sides of the fabric facing each other. Pin them along the two long sides and the bottom edge, leaving the top open.
Set your machine to a straight stitch. Sew along the three pinned sides with a 1/2 inch (1.3cm) seam allowance. The seam allowance is the distance from the fabric edge to your stitch line.
Remember to backstitch at the start and end of each seam. This means sewing forward a few stitches, then backward, then forward again. It locks your stitches so they don’t come undone.
Here’s a pro tip: when you reach a corner, stop with the needle down in the fabric. Lift the presser foot, turn the fabric 90 degrees, lower the foot, and continue sewing. This gives you a sharp, clean corner.
Step 3: Creating the Handles and Top Hem
Now let’s make the handles and finish the top of the bag.
- Create the Handles: Take one handle piece. Fold it in half lengthwise with wrong sides together and press it. Open it up. Now fold the raw edges to the center crease you just made and press again. Finally, fold it in half along the original crease. You’ll have a 1-inch wide strap with no raw edges showing. Stitch close to both long edges. Repeat for the second handle.
- Prepare the Top Hem: Take your bag body (still inside out). At the top opening, fold the raw edge down 1/2 inch (1.3cm) toward the inside and press. Then, fold it down again by 1 inch (2.5cm) and press again. This creates a clean, double-folded hem that hides the raw edge.
- Attach the Handles: Tuck each handle end under the folded hem, about 3 inches (7.5cm) from each side seam. Make sure the handle isn’t twisted. Pin it securely. Do the same for the other handle on the opposite side.
- Sew the Hem: Stitch along the bottom of the folded hem all the way around the top of the bag. This secures both the hem and handles at once. For extra strength, sew a second line around the very top edge.
Step 4: Finishing Touches and Celebration!
Trim any loose threads. Turn the bag right side out and give it a final press with your iron.
And that’s it! You did it! You turned flat fabric into a useful, three-dimensional object. Take a moment to appreciate what you’ve accomplished.
“Oops!”: Common Beginner Mistakes and How to Fix Them

Everyone who sews faces these issues. They’re part of learning. Knowing what they are and how to fix them will save you from frustration. This isn’t about failure; it’s about learning how machines and fabric work together.
We’ve all stared at tangled thread wondering what went wrong. The good news is most problems have simple fixes.
| Problem | Likely Cause(s) | Quick Fix |
|---|---|---|
| Thread gets tangled underneath the fabric (“Bird’s Nests”) | The machine was threaded with the presser foot down. The upper thread doesn’t have the correct tension. | Stop! Don’t force it. Cut the threads, remove the fabric, and re-thread the machine completely from the start, making sure the presser foot is up. |
| Seams are wobbly and uneven | Sewing too fast; watching the needle instead of the edge guide. | Slow down—it’s not a race. Guide the fabric gently and keep your eye on the seam guide on the machine’s needle plate, not the needle itself. |
| Fabric is puckering or gathering as you sew | The upper thread tension is too tight. The needle is dull, damaged, or the wrong type for your fabric. | First, try re-threading the machine. If that doesn’t work, reduce the upper tension slightly. If it still puckers, change to a new, sharp needle. |
Tangled Thread (Bird’s Nests)
Thiis is the mpst common beginner trouble . It most forever Think The automobile waas n’t wander aright , nrmally because the presser fundament was down . When thhe groundwork is up , teensity disc oened so Thread backside decent . When it ‘s down , record are closed and, meandder just sits on top , stimulate pandemonium below .
Wobbly, Uneven Seams
The urge to sew fast is strong, but precision comes from control. Gently guide the fabric—don’t push or pull it. Let the feed dogs move the fabric. Practice sewing straight lines on scrap fabric until it feels natural.
Fabric Puckering
If fabric ruck alonng the wrinkle , your machhine is credibly shinny . the top and bottom yaarn are agitate each other . Usually , the top yarn tensity is too tight . Always prove youe stitch on fleck textile from your labor before tailor the substantial matteer . It prevent many job .
Your Sewing Journey Has Just Begun
Take a deep breath and look at what you’ve learned. You’ve moved from curiosity to action. You’ve prepared your mind and space, learned about tools, understood fabrics and patterns, and finished a real project. That’s a huge achievement.
Sewing is a journey, not a destination. There will always be new techniques to learn, new fabrics to try, and new projects to challenge you. Be patient with yourself, stay curious, and celebrate each step forward.
You’ve taken the first and most important step. Now, what will you make next?
Happy sewing!
FAQ:
- What basic tools do I need to start learning how to sew clothes?
To learn how to sew clothes, you’ll need a sewing machine, fabric scissors, pins or clips, measuring tape, seam ripper, appropriate fabric and thread, and an iron with ironing board. - What is the best fabric for beginners learning how to sew clothes?
For beginners learning how to sew clothes, medium-weight woven fabrics like 100% quilting cotton or cotton poplin are ideal as they’re stable, easy to handle, and responsive to ironing. - How important is pre-washing fabric when learning how to sew clothes?
Pre-washing fabric is essential when learning how to sew clothes because natural fibers like cotton shrink during natural fibers like cotton shr natural fibers like cotton shr the first wash – skipping this step could result in garments that no longer fit after natural fibers like cotton shr washing. - Can I learn how to sew clothes without a dedicated sewing room?
Yes, you can learn how to sew clothes in a small space – even a quiet corner with good lighting, a comfortable chair, stable surface for your machine, and accessible storage is sufficient. - What is a good first project for someone learning how to sew clothes?
A simple tote bag is an excellent first project when learning how to sew clothes as it uses straight you can learn how to lines, teaches basic skills like seams and hems, and creates a useful item with minimal complexity.


