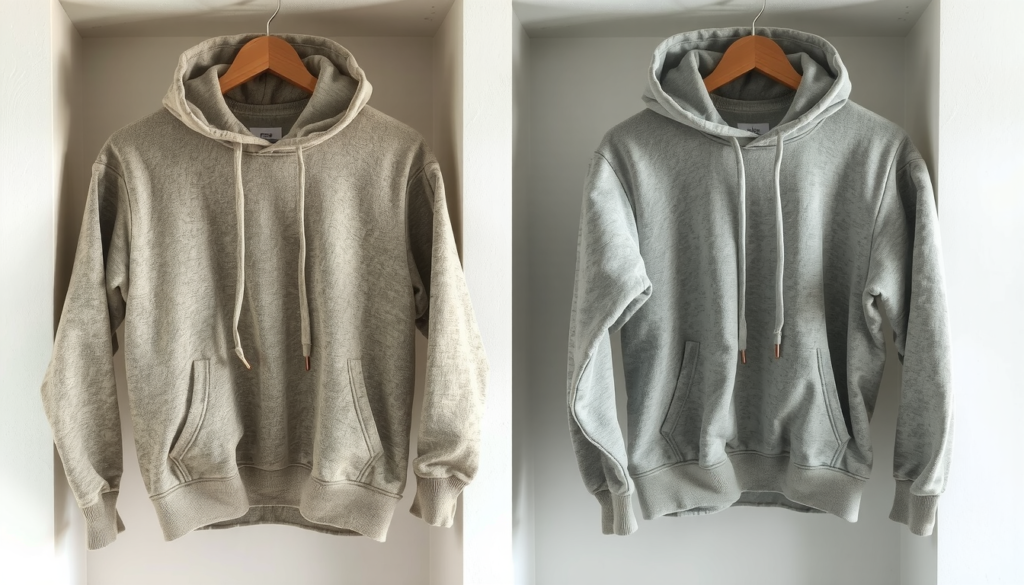
Teaching yourself how to make a hoodie that you can wear for the very first time is an interesting task. It’s just awesome to wear something that you crafted with your own hands. This guide is designed to be your stepwise roadmap through the whole process, from selecting the perfect fabric to sewing the last stitch. You will be sure to beam with pride wearing the very hoodie you made.

This is a pretty comprehensive guide for you to learn how to make a hoodie. You will find out how to do the following:
- Choose the most suitable materials and the pattern.
- Cut your fabric right.
- Assemble your hoodie line by line.
- Add professional finishing touches.
It’s very exciting to sew your own hoodie. With the help of our directive guidelines, you are bound to make a garment that you will like to wear. Let’s start.
Pre-Sewing: Materials and the Planning Process
A great hoodie starts with a clear plan. Before you cut or sew, you need to get all your tools and materials in one place. The following checklist will ensure all the building blocks are in place. This makes learning how to make a hoodie much more efficient.
Your Hoodie-Making Toolkit: The Necessary Items
Consider this as your shopping list. Having these items ready will stop delays later on.
- Fabric: This will be discussed in detail in the next section.
- Sewing Machine: You will need a machine that has a stretch stitch or a zigzag stitch. This is key for sewing knit fabrics.
- Needles: Use ballpoint or stretch needles. A 90/14 size works well for most hoodie fabric types.
- Thread: All-purpose polyester thread is durable and effective.
- Pattern: You may either buy one, trace an old hoodie, or download a free one from the web.
- Cutting Tools: Sharp fabric scissors or a rotary cutter and a self-healing mat.
- Measuring & Marking: A flexible measuring tape and fabric chalk or a water-soluble pen.
- Pins or Sewing Clips: To hold the fabric pieces together.
- Iron and Ironing Board: Pressing seams makes them neat and smooth.
- Optional: A serger for professional seams, grommets for the drawstring holes, and a drawstring cord.
Picking Your Blueprint: Pattern Options
The pattern is the framework of your hoodie. Here are three common choices. Each has its own advantages.
- Option 1: Store-Bought Patterns: Well-known brands like McCall’s or Simplicity have great patterns. They can provide various sizes and detailed instructions. The disadvantage is that they need to be purchased and often require small adjustments for a perfect fit.
- Option 2: Tracing an Existing Hoodie: This is a cost-free method to get a pattern that you are sure fits. However, it is essential to trace each piece very carefully. You will not have any written instructions to follow.
- Option 3: Free PDF Patterns Online: Many sites on the internet share patterns for free that you can download and print. The quality may vary. You will need to tape many pages together. For a good starting point, you can find a good hoodie pattern and tutorial online.
The Right Fabric Makes All the Difference
Choosing the right fabric is the most important decision you will make. The fabric affects the warmth and feel of your finished hoodie. If you want it to feel standard and cozy, search for fabrics in the 250-380 GSM range. GSM means Grams per Square Meter.
Here is a simple table to help you choose:
| Fabric Type | Weight (GSM) | Stretch | Best For | Notes |
|---|---|---|---|---|
| Fleece | 250-400+ | Low | Cozy, warm winter hoodies | Easy for beginners. Doesn’t fray. |
| French Terry | 250-350 | Medium | Classic, all-season hoodies | Smooth on the outside, loops on the inside. |
| Sweatshirt Knit | 280-380 | Low-Medium | Traditional sweatshirts | Very stable and easy to sew. Often has a soft, fuzzy back. |
| Cotton Jersey | 140-220 | High | Lightweight, T-shirt style hoodies | Can be curly and harder to manage. |
| Rib Knit | 200-300 | Very High | Cuffs, waistband, and neckbands | Excellent stretch and recovery. |
How to Make a Hoodie: Sewing in 7 Steps
Now for the fun part: sewing your hoodie. We have broken down the process into seven easy steps. Adhere to them in order. You will watch your hoodie take shape as you go.

Step 1: Pre-wash and Cut Your Fabric
This crucial step shouldn’t be skipped.
- Pre-wash and dry your fabric the same way you will wash the finished hoodie. This prevents it from shrinking later.
- Iron your fabric to remove all wrinkles. A smooth surface is needed for accurate cutting.
- Lay out your pattern pieces. Be sure to follow the grainline arrow on each piece. The grainline should run parallel to the fabric’s edge.
- Pin the pattern pieces to the fabric. Carefully cut each piece out with sharp scissors or a rotary cutter.
Step 2: Put Together the Body and Shoulders
Your hoodie will start to look like a real garment in this step.
Place the front and back body pieces together. The “right sides” of the fabric should be facing each other. Pin them at the shoulder seams.
Sew the two shoulder seams. Using a stretch stitch or a serger will allow the seams to stretch with the fabric.
Step 3: Make and Attach the Sleeves
This step might look challenging, but it’s easy if you take it slow.
First, fold each sleeve piece in half lengthwise with right sides together. Sew the long underarm seam on each sleeve.
Now, pin the top of the sleeve into the armhole of the body. Match any notches from your pattern. Line up the underarm seam of the sleeve with the side of the hoodie body. Sew it in place. Go slowly around the curve.
Step 4: Sew the Side Seams
This is a fun step where your flat pieces become a 3D garment.
With the hoodie still inside out, lay it flat. Pin from the sleeve cuff all the way down the side to the bottom hem in one long, straight line.
Sew this entire seam on both sides of the hoodie. You now have a body and sleeves that look like a hoodie.
Step 5: Create and Attach the Hood
The hood is what makes a hoodie a hoodie. Take your time here to get it right.
Sew your two hood pieces together along the long, curved back edge. Press the seam open. Finish the front edge of the hood by folding it over and stitching it down. This creates a channel for the drawstring.

Pin the bottom edge of the hood to the neckline of the hoodie body. Match the center back seam of the hood with the center back of the neckline. Overlap the two front edges of the hood slightly at the center front of the neckline. Sew the hood to the body. For a clear visual, this detailed video tutorial shows how to perfectly align and attach the hood.
Step 6: Add Cuffs, Waistband, and Pocket
These details give your hoodie a professional and finished look.
- Cuffs and Waistband: Take your rib knit pieces. Sew the short ends together to create tubes. Fold each tube in half, wrong sides together, to form the finished cuff and waistband. Stretch them slightly as you pin and sew them to the sleeve openings and the bottom hem of the hoodie.
- Kangaroo Pocket: Take your pocket piece. Fold the top edge over and stitch it down. Then, fold the other three edges under. Pin the pocket onto the front of your hoodie and topstitch it in place along the sides and bottom. For great visuals on this part, this detailed DIY guide is very helpful.
Step 7: Finishing Touches
You are almost there! These last moves finalize your project.
If you want a drawstring, install metal grommets on each side of the hood opening. Thread your drawstring cord through the channel and out the grommets.
Finally, give the entire hoodie one last press with your iron. This sets the seams and gives it a crisp, store-bought look.
Pro Tips and Making It Your Own
Learning how to make a hoodie is just the beginning. These suggestions will help you solve common problems and make your next project even better.
Fixing Problems: Avoiding Common Sewing Mistakes
Even experienced sewers run into issues. Here is how to fix them.
- Problem: Wavy Seams. Knit fabrics can stretch as you sew. This causes wavy seams.
- Solution: Use a walking foot on your machine if you have one. You can also try reducing the presser foot pressure. Always use a stretch stitch, not a straight stitch.
- Problem: Skipped Stitches. Your machine may fail to form a complete stitch.
- Solution: This is almost always caused by the wrong needle. Change to a new ballpoint or stretch needle. Make sure it is inserted correctly.
- Problem: Puckered Hems. The bottom hem or cuffs look gathered or puckered.
- Solution: Use a twin needle to create two parallel rows of stitching that can stretch. A simple zigzag stitch also works well as a hem for knit fabrics.
Make It Yours: Fun Ways to Customize
Now you can get creative and design a hoodie that is truly one-of-a-kind.
- Use a different, contrasting fabric for the inside of the hood or the pocket.
- Add custom embroidery or an iron-on patch before you sew the pieces together.
- Create a color-blocked hoodie by cutting the sleeves, body, and hood from different colored fabrics.
- For truly unique graphics, professional techniques create amazing results. For example, a puff print hoodie manufacturer can add raised, 3D designs for a high-end look that stands out.
Beyond DIY: When to Partner with a Hoodie Manufacturer

Your journey into making clothes might grow beyond a single project.
From Hobby to Business
While learning how to make a hoodie is a great skill, what happens when you need 10, 50, or 500? For a clothing brand, a team, or an event, you need many identical items.
This is where a professional hoodie manufacturer is the perfect partner. They handle everything from sourcing fabric to cutting and sewing at a large scale. This makes sure every hoodie is the same and finished to a high standard. For a complete view of production services, working with a full-service clothing manufacturer can help bring any clothing idea to life.
Common Questions (FAQ)
Here are answers to some common questions we hear from people learning how to make a hoodie.
How much fabric do I need to make a hoodie?
This depends on your size and the fabric’s width. As a general rule, you will need 2 to 2.5 yards of 60-inch wide fabric for an adult pullover hoodie. That’s about 2 meters. Always check your specific pattern’s instructions for the exact amount required.
What’s the best stitch to use for sewing hoodies?
You must use a stitch that can stretch. Hoodie fabrics are knits. A regular straight stitch will break when the fabric stretches. The best choices are a narrow zigzag stitch, a triple stretch stitch, or a serger. The triple stretch stitch looks like a lightning bolt.
Can I make a hoodie without a sewing machine?
You could, but it would be very difficult. Hand-sewing a hoodie with a strong backstitch is possible, but it would take a huge amount of time and effort. A sewing machine is highly recommended to create strong seams that will last.
How do I add a zipper to make a zip-up hoodie?
To make a zip-up hoodie, you start by cutting the front body piece in half down the middle. You then sew a separating zipper onto each of these front halves. After the zipper is installed, you build the rest of the hoodie as usual. This is a more advanced skill. Look for a tutorial made just for zip-ups.
What is the best fabric for a beginner learning how to make a hoodie?
A stable, medium-weight knit fabric is best for beginners. We recommend sweatshirt fleece or French terry. These fabrics are less slippery and do not stretch as much as lightweight jersey. This makes them much easier to cut and sew.
You have now learned everything from planning and choosing materials to sewing and finishing your garment. Making your own hoodie is a process that ends with a unique piece of clothing made just for you.
Now, grab your fabric and get ready to create your new favorite hoodie.


